Wednesday, April 25, 2012

30 Days of Pinterest: Day 24

There’s always loads of bananas left at my Mother’s house and I used to often use them up as banana bread. When I was there the other day, I noticed there was some that needed using up so I took them home with me. Not wanting to use them for my usual banana bread, I looked through Pinterest for ideas. And found a recipe for Roasted Banana Honey Nut Muffins from Curly Girl Kitchen.

DSC02944

Roasted Banana Honey Nut Muffins

Ingredients

2 ripe bananas

1/2 cup of honey

2 tbsp vegetable oil

1 egg

1 tsp vanilla extract

1 cup plain flour

1/2 tsp baking powder

1/4 tsp baking soda

1/4 tsp salt

1 tsp cinnamon

1/2 cup chopped walnuts (though the original uses almonds)

Method

1. Preheat oven to 200°C (400°F). Roast the bananas for about 20 minutes. They will go a bit black and mushy inside but that’s ok! It’s supposed to happen. Reduce oven to temperature 180°C (350°F)

2. Leave the bananas to cool until you can handle them. Peel and mash in a bowl. Add the honey, oil, egg and vanilla and whisk to mix together.

3. In a separate bowl, sift together the dry ingredients (flour, baking powder, baking soda, salt and cinnamon). Add the walnuts too to coat (so they won’t sink to the bottom).

4. Add the dry ingredients to the wet ingredients a few tablespoons at a time and mix until just moistened.

5. Fill into cupcake cases and bake for about 15 minutes. If you decide to make bigger muffins, then bake for about 20 minutes.

6. Allow to cool in pan for 5 minutes before transferring to cool on a wire rack.

You can eat them warm or you can eat them like I did with some chocolate spread!

DSC02949

Testing out my new nail art pens earlier

They’re very moist and the taste is different to the banana bread I usually bake. I’d say they’d be yummy with almonds so next time I think I will make them like that!

DSC02946

Monday, April 23, 2012

30 Days of Pinterest: Day 23

As some of you may know, I love baking. Which often leads to running out of ingredients. And top of that list is often vanilla extract. I’d pinned a ‘How to Make Your Own Vanilla Extract’ by Bethany Actually around Christmas time but had forgotten about it until I ran out of extract at the weekend. While shopping today, I decided instead of buying more I’d just make my own.

pin picture

Here’s what you need:

-A glass bottle (try not to have it too large though as you’ll need more vanilla beans. The above bottle is 200ml which is perfect. If you don’t have a bottle, a glass jar would be handy)

-Vanilla pods (2-3 is about right for 200ml. If you plan on making loads of these or use a lot of vanilla pods, it is much much cheaper to order them online. I have no idea where but I just know this as a fact!)

-Vodka (And for anyone curious, I won that massive bottle above!)

-Knife or scissors to cut vanilla pods

-Funnel (it makes things easier)

1. Make sure you bottle or jar is properly clean before using!

2. Cut the vanilla pods in half. Then slice the halves down the middle to open them up, just stopping short at the end so they are still connected.

DSC02938

3. Put the pods in the bottle. Using the funnel, pour vodka into bottle or jar, making sure the pods are covered.

DSC02936

And absolutely amazing after shot (not!).

4. And then the Waiting Game. Bethany Actually suggests you leave it a month to steep until it turns a dark brown colour. I suggest giving it a shake every few days. From what I can see already, there’s tiny bits and pieces of the pods floating in the vodka. Presuming it’s still there after 30 days, you could probably filter these bits out (using a funnel and kitchen paper).

Also I read somewhere else that you can just top up with vodka so you don’t need to keep remaking it from scratch (can’t remember where I read that,will update if I do find out!). I plan on decanting into an empty vanilla essence bottle I have for easy of use and topping up by that much after.

I’ll take pictures of updates along the way too and a review once it’s finished. Very excited about this, hoping to do lots more infused alcohols this summer!

30 Days of Pinterest: Day 22

Once again I was slacking so I decided to try out a hair style that I might use tomorrow. I went for this simple braided up-do by Oh So Pretty The Diaries. And here’s how it turned out!

DSC02917

DSC02918

I quite like it! And it was easy to do. Here’s how!

1. Tease the top of your hair to give a little volume and then smooth out (this is optional though).

2. Split hair into 3 equal parts. Then split each of those parts into 3 equal parts (so now you have 9 equal parts, A1,A2, A3. B1,B2,B3. C1.C2.C3).

3. Take one of the small parts (for example A1) and plait/braid this. Then plait A1, A2 and A3 together. Secure into place with a clear hair tie or with one the same colour as your hair.

4. Repeat with the B and C sections of the hair. So at the end you will have 3 plaits, which is made up as one smaller plait and 2 unplaited pieces.

5. Loosen out these plaits a bit and then roll up into buns. Secure into place with kirby grips/bobby pins. Spray with hair spray if you wish.

Phew, I hope that makes sense! If not, definitely check the link above where I got the idea, they do a step by step photo guide. I couldn’t do that unfortunately as my boyfriend is playing computer games at the moment! He did say it looks very Heidi-ish.

Sunday, April 22, 2012

30 Days of Pinterest: Day 21

We’ve hit the 3 weeks mark! And I’d thought I’d treat myself to mark that occasion (any excuse really!). I’d seen a recipe last year for Dutch pancakes on Craftster and the other week it popped into my head. So I searched for it and pinned it the blog it came from, The Intermission. I LOVE pancakes and Yorkshire Puddings, so this looked like it was right up alley.

DSC02916

Dutch Oven Pancakes

Ingredients

3 eggs
2 tbsp melted butter + 1 tbsp for pan
1 tbsp sugar
1/2 cup milk (I used full fat but it’s up to you)
1/2 cup plain flour
1/4 tsp vanilla extract (original recipe uses lemon,I preferred vanilla though)
pinch of salt

Icing sugar to serve

Method

1. Grease pan with a little oil (I mean a little too!). Preheat oven and pan at 220°C (425°F).

2. Whisk eggs until light and frothy. Add the milk, butter, sugar, salt and extract and mix.

3. Fold in the flour. The mixture will probably be a bit lumpy.

4. While the pan is hot, remove from the oven and add the butter, swirling to coat the entire pan. Add the batter to the pan and bake for 20 minutes or until golden and puffy.

5. Dust with icing sugar and enjoy start away!

DSC02914

Motion shot!

Keep an eye on the pancake while in the oven (without opening the door if possible) or else it will end up like this!

DSC02913

I got a great shock when I looked in the oven and saw it expanding all over the place! Though I just cut off the sides and ate them, they tasted like Yorkshire Puddings! And while the main pancake part was much more like a dessert.

Saturday, April 21, 2012

30 Days of Pinterest: Day 20

I had good intentions to do something crafty today but it went out the window with being roped into babysitting duty and other last minute plans. So I thought I’d use today for some more visual reasons I use Pinterest: decorating!

What’s amazing about this picture is that it’s someone’s house, not a cafe! I fell in love with it the first time I saw it. (Via Johanna Öst’s Flickr)

This is one way to insure he has sweet dreams every night! (via Supermarket Sarah).

I think this is just genius!! What a great way to store magazines and also create extra seats. (via Apartment Therapy).

A suitcase that’s been turned into a chair! (via http://www.kristanlynn.com)

There’s just something I’m drawn to when it comes to bird cages. (via http://turquoisetulipsandbliss.tumblr.com)

I have loads of cushions pinned,I just love them. This is one of my current favourites. It by etsy user mybeardedpigeon and they do loads of different map cushions I seriously want them all!

Friday, April 20, 2012

30 Days of Pinterest: Day 19

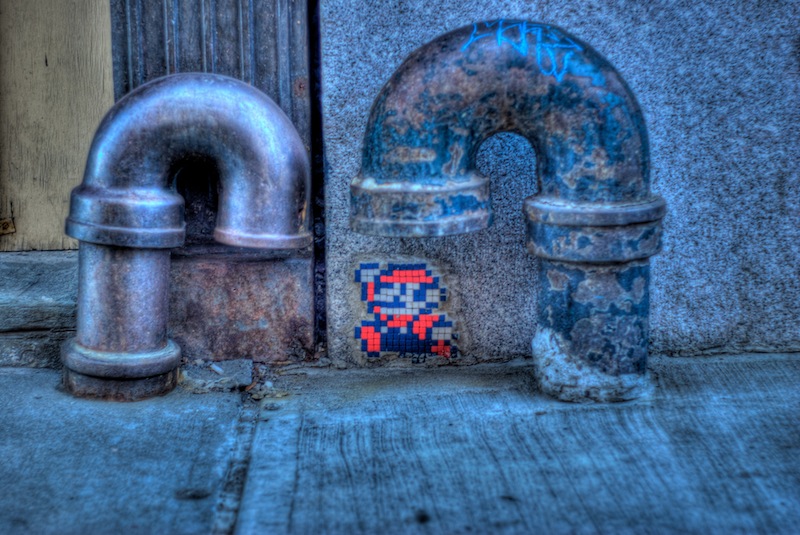
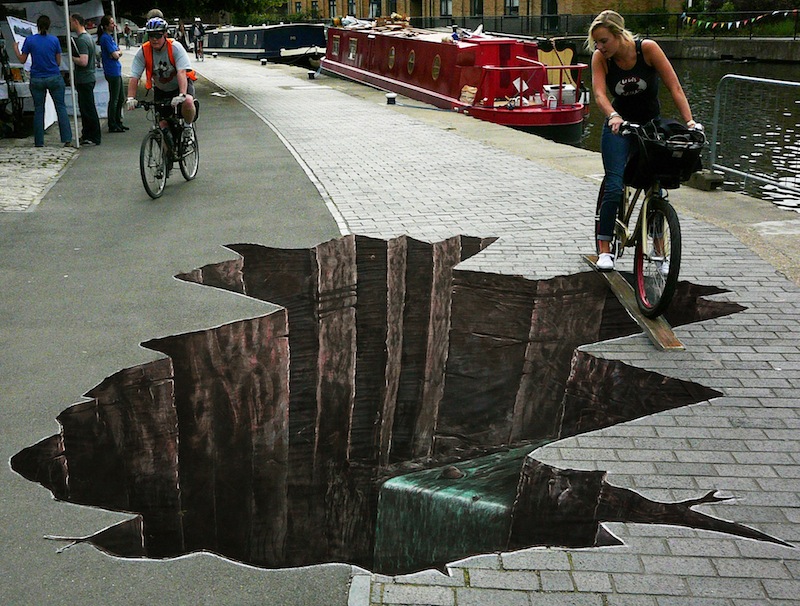
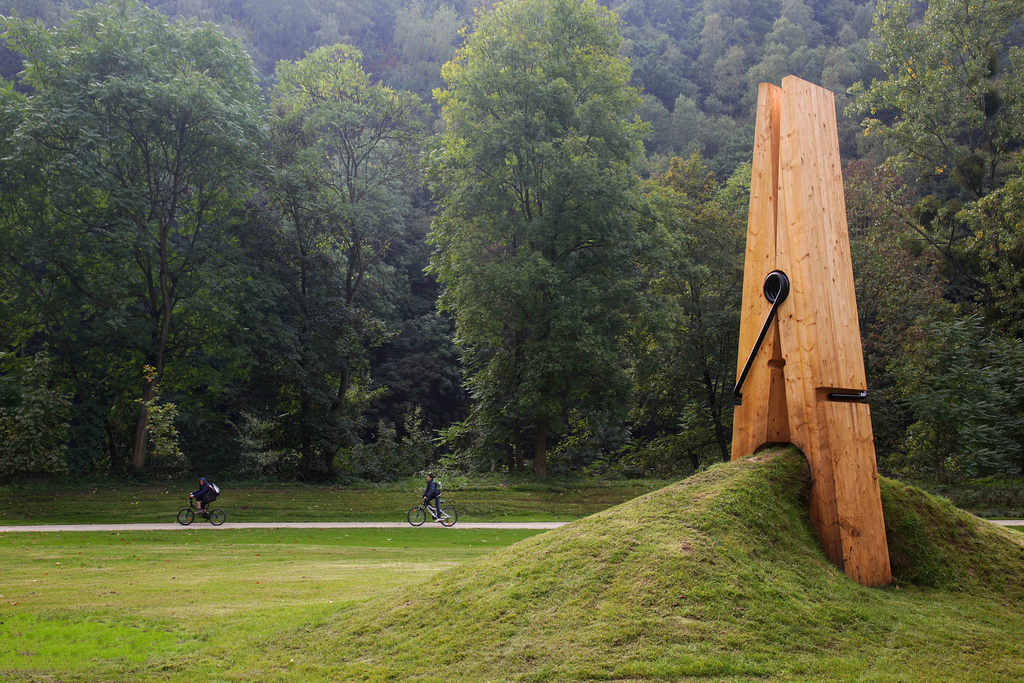
What I like about Pinterest is that you can pin ideas and recipes, other practical things. But also that you can just pin things purely for visual. One thing I’ve been getting interested in is street art. I don’t mean proper word graffiti but more clever drawings and use of what’s already there. Here are some of my favourites

From Street Art Utopia. I love the use of the drain and the pole, it’s so clever!

From JunkfoodClothing. This one makes me laugh, probably because it’s a pink skeleton!

From Street Art Utopia. So simple yet so clever.

From Street Art Utopia. My inner nerd loves this!

From behance. And this too!

From Junk Food Clothing. I love the textures used here. Knitting graffiti is something I saw a bit when I was in college, I love seeing big projects.

From Street Art Utopia. 3D art like this is amazing! There’s loads more like this, they look so real.

From Street Art Utopia. Picture by mmarsupilami. Art isn’t just painting! I love this giant clothes peg!

I have loads more and I’m still discovering some. That’s why I love Pinterest, so many of these would be still unknown to me if I hadn’t seen them on Pinterest.

Thursday, April 19, 2012

30 Days of Pinterest: Day 18

This one is late as I was trying to do one pin but it wasn’t working out. So I changed to try something else. Originally, I was trying to do nails with a peek-a-boo strip of colour coming through a black overcoat, like this pin from pshiiit.com. Unfortunately, the tape I was using (Christmas ribbon) just wasn’t working so I grabbed some electrical tape and used the Explosion Tutorial from Nailside as inspiration. And here’s the results!

DSC02904

DSC02911

DSC02904

As you can see, I’m still loving the pastel shades! Maybe I’ll bore of them some day soon…

Here’s the cast of characters:

Pink- Angelica Nail Colour in Sweetie Pie

Yellow- Angelica Nail Colour in Lemoncello

Purple- Angelica Nail Colour in Palma Violet

Blue- Angelica Nail Colour in Skylar

Orange- Catrice Ulitmate Nail Lacquer in MAN, GO Tango mixed with a white to make it slightly pastely.

Black- Wet N Wild in Black Cream

Glitter- Kiss Nail Art Paint in Silver Glitter

Related Posts Plugin for WordPress, Blogger...